Showing posts with label DIY. Show all posts

7.07.2011

I'm cranking these babies out...

The latest:


I am loving that with each apron, I can see how I am improving and progressing. 

This one was a lot of fun! The fabric is from Mood Designer Fabrics (I made it work!), and the legit vintage buttons and sash were {awesome} finds at the last Rose Bowl Flea Market

I seriously considered keeping this, but it was my first for-realsie-paid-apron-order, so I wasn't allowed. Thanks mom! :]

 So I have officially decided to start an Etsy shop. Soon.

But first, I am really excited about checking out the  
Renegade Craft Fair on July 16. 
Are you going?

I am planning on being thoroughly inspired there--regarding styles, business names, marketing strategies, pricing, etc. etc. So my plan is to launch my online shop something by August 1. We will see how that plan goes! 

Until then, I have 4 apron orders from friends 
and family to keep up with. Woot!

4.02.2011

shameless plug

Did you see me on Wipeout?

The episode aired March 31, 2011 and is called "John Henson, Zombie Hunter"

They dubbed me "Mrs. Fixity" :]

Here it is, via hulu.com:


Here is a 2 minute clip of me on the qualifier {the first round of the obstacle course game show, for all of you people who are missing out in life, and don't watch Wipeout!}


{these links won't work forever, but here they are for now!}

Feel free to laugh at me, not just with me :] That was kind of the point. 

But yes, it really hurt!

Love,
Mrs. Fixity

2.01.2011

ge-ge-ge-ge-genius

Don't ask why I stuttered. Just thought it would make something that is genius sound a little thug, and a little more legit.

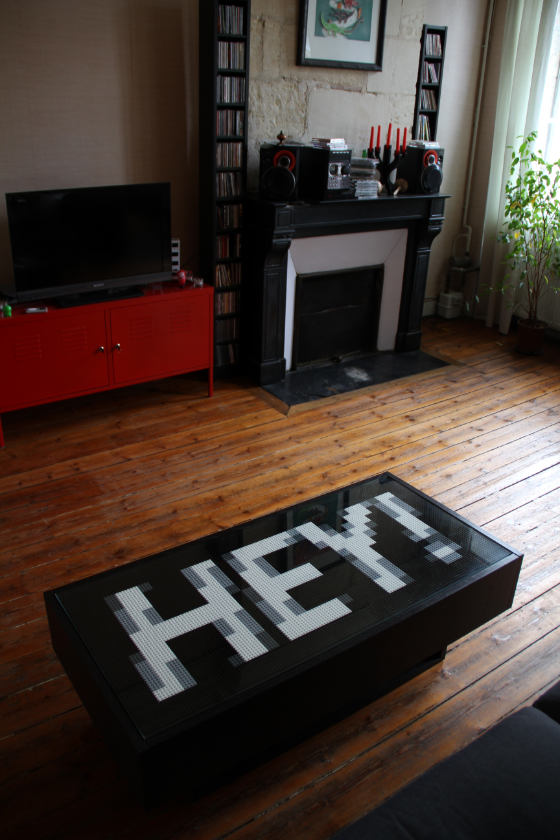
{ Lego covered IKEA table via Toki Woki }

I love how this wraps up DIY, budget-friendly, modern art, practicality, conversation starter, and (replacement of a need for) a coffee table book all in one amazing package!

Follow the link to Toki Woki's blog for all the instructions on how he did it--we are talking nitty gritty details, here. Very helpful if you really want to tackle this project!

1.26.2011

my latest creation

A couple weeks ago my husband asked me to sew an apron as a wedding gift for his childhood friend... he asked the night before the wedding. Oh, husbands!

Well, I haven't sewn in awhile, so I thought it was a good excuse to get back in the saddle.

So hubs and I went to the fabric store that night, and I went to work. Hubs stayed up with me until 3:30am until I completed it. 

He was great moral support: "Keep sewing, woman!"

No, really. He said that. But it was funny, not abusive.


As tired as I was, and as frustrated as I got with it... I am thrilled with the end result. I hope the bride likes it as much as I do!

Best sewing project yet! I am making progress!

12.19.2010

What I ACTUALLY diy'ed...

Unfortunately, I work in retail. 

(I just decided mid-sentence that that made for a good sentence by itself.)

Okay, but really... Unfortunately, I work in retail management, which means that Christmastime is the BUSIEST time of year. So my dream life of being at home baking and crafting and making a personalized handmade gift for everyone and their dog is not a reality ...(yet? maybe one day?)

This year I discovered Feels-Like-DIY.  Feels-Like-DIY still satisfies my crafting urge, still has the element of homemade feel, but doesn't require nearly as much time as making something completely from scratch. 

Still impressive to gift-receivers, but not as strenuous on the gift-giver. Perfect!

So on the weeks that I wasn't working 85 hours (oh, you think I am joking?), this is what I did to get my holiday cheer squeezed in.

1. Baked mom's sugar cookie recipe
{ Okay, so these are cookies I made last Christmas... 
The cookies I made this year may or may not have been devoured too quickly for a photo shoot.}

2. Assembled feels-like-DIY Christmas cards (I used a fabulous little PDF template to print via Gifted Magazine (see below).) In addition to the required cutting and folding, I added some extra awesome-ness by stamping the address labels with our monogram in gold ink (leftover wedding thank you materials!)

3. Made 8 batches of peppermint bark (whew!)


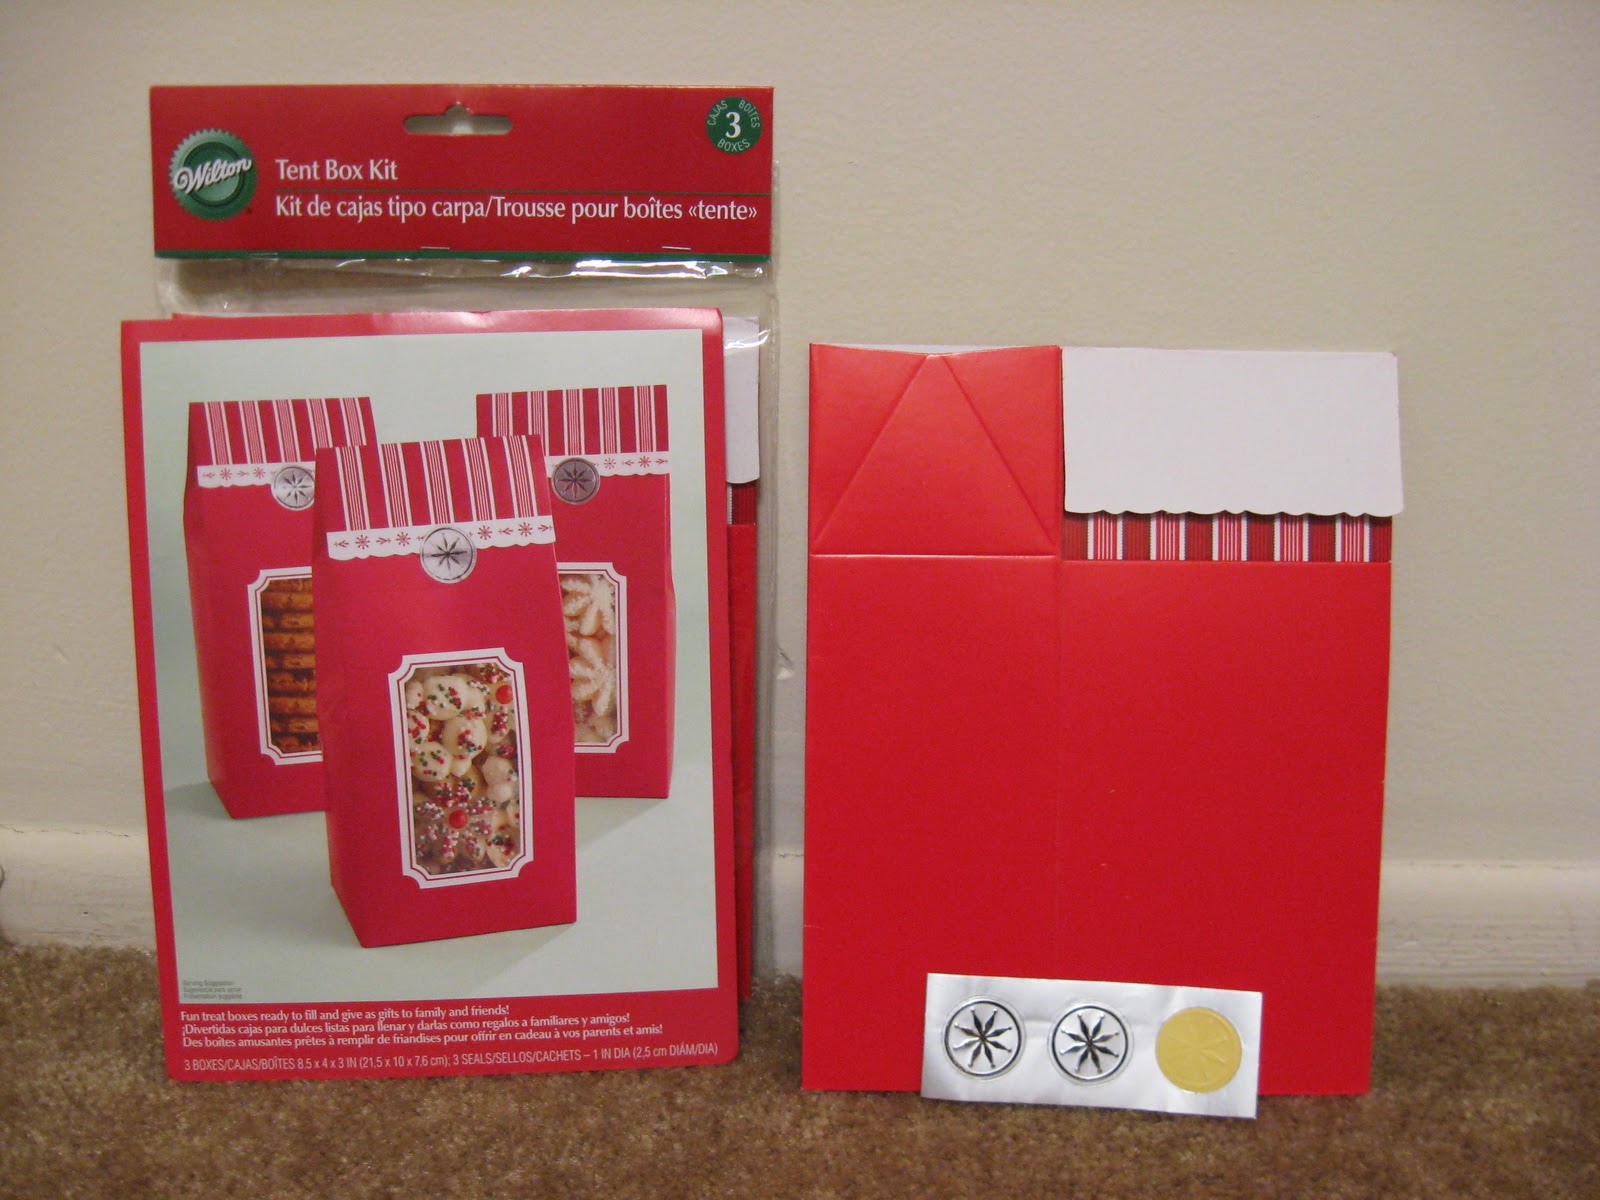
4. Assembled feels-like-DIY gift boxes for the peppermint bark 

5. Waited 45 minutes in line at the post office to mail off these little babies.*


*I ran into my uber-friendly neighbor in line at the post office, so it made the wait time much more enjoyable. I love our new apartment building. I've run into this guy at Starbucks and now at the post office. It feels so small town! And the other day I came home to a little bag of Christmas cookies on our welcome mat with a tag that said: "Happy Holidays! From Apartment #6" How adorable?!

I still have a couple more things to pick up, but I feel very accomplished so far. The first person on my list is proving to be most difficult--my husband! Eek!

Are you done Christmas shopping/creating?

12.18.2010

Christmas DIY ideas

I love decorating and baking for Christmas. 

These were all in the running for my list of DIY projects and gift making this year.


Mom's sugar cookie recipe


What have you made this Holiday Season? 
What's still on your to-do list?

10.05.2010

Mash-up chandelier

I am SO excited about this.

I just discovered an amazing interior design firm in Hollywood called spacecraft. 

They happen to share a space with hub's new commercial agent (woo!). I went to a quick meeting with him, and had to hold my hand over my mouth to avoid embarrassing him with my ecstatic squeals. 

Their office is so. freaking. cool.

I wanted to take pictures so badly, but hubs wouldn't allow (read: embarrassment). However, I found a photo online of an office party they had, that shows off my FAVORITE element of the waiting room--the mashup chandelier.


Look beyond the paper lanterns, and drink in that amazing garage-sale-finds-separated-at-birth-and-now-thrown-together-perfectly chandelier.

Ahh! I want it!

The best part is, I could totally MAKE it!

Next exciting thought... we move in t-minus 10 days, and our new apartment has vaulted ceilings. 
*holding in squeals!*

10.03.2010

progress

I'm so proud of myself for knocking out of the items on my to-do list before we move (see it here)

I painted our table:

 Remember the before?


 After!

I sewed new pillow cushion covers:


Recognize the fabric?

I'm telling myself that it's not too matchy-matchy, and was a resourceful choice :]

Next on the list... painting the bookcase. This will be quite an ordeal, but I have all my equipment:


I also just posted a craigslist ad for our end tables, started a "Goodwill" pile and and hubs started going through our stupid filing cabinet of randomness.

Progress!

9.18.2010

Redecorating on the cheap

We are moving next month--five blocks away and $325 less per month. Holla. So while I hate the act of moving, I am excited about decorating a new space. And by decorating, I mostly mean re-arranging and re-purposing what we already have.

My immediate list for our new apartment is:
1) Paint our dinette table (if you could call it that?) black
2) Use it's table cloth elsewhere, to cover up some clear storage bins
2) Recover our couch pillows in black and gray, to better coordinate with the coffee table, tv table, and wall art that we already have
3) Ditch our cool-but-have-served-their-purpose 1960's mosaic end tables that don't match much, and won't fit in our new living room
4) Keep our walnut colored furniture and other decor in close vicinity of each other, and do the same for our black furniture and knick-knacks, to look more intentional with our decorating

My "eventually" list for our new apartment is:
5) Possibly sew a long curtain to cover the exposed shelving in the hallway (we'll have to see how it looks with all our stuff unpacked)
6) Make one of these book page wreaths. So Anthropologie. Love it.

{ Living with Lindsay book page wreath tutorial }

Today, I started on #1 by painting our dinette table that you may remember from DIY dining chair revamp. Look forward to a post about that soon :]

4.12.2010

because everyone loves a makeover...

I don't know about you, but I can't afford a shoe closet overhaul, no matter how much I may want one. So despite my longing for new shoes, I decided to work with what I had to give it a little boost.

Here is what I did:
1. Bought 2 pairs of $1.49 shoes (okay, this wasn't part of the plan--but it seemed like a practically free improvement!)
2. Pulled out a couple pairs that I'm just not feelin' anymore (i.e. So uncomfortable that I never wear them, anyway)
3. Washed 3 pairs of cloth flats
4. Spot treated my sneaks with carpet cleaner.
5. Cleaned the suede on some boots, and the details on my sneaks (and Matt's sneaks, too!)
6. Gave my favorite pair of shoes a makeover.

The makeover part is my real insider secret here, so I will explain.

Remember the days of shoe repair? Probably not. It was long ago. But why can't we keep that little corner cobbler in business? And why don't we even consider fixing our worn out shoes? Well, this is a loaded question, but the short answer is this: most of the shoes we buy are made cheaply to accommodate our throw-away consumer society. Most of our shoes are not repairable. But I bet you have at least one really good pair of shoes--or at least a leather pair. There are some things you can do to repair well-made shoes, with a little time, and oftentimes, only a few dollars.


I bought these shoes at least 5 years ago...and they are one of my absolute faves. They are such a fun, yet neutral color, and they are really comfortable, yet dressy enough for work. After about a year of wearing these shoes A LOT, I noticed that the gold was starting to wear off, especially at the toe and the heel. They were lookin' a little shabby. So I stopped wearing them, but couldn't give them up. Then I got the idea to try and repaint them. 

I went down to Sander's Shoe Repair in Salem, and picked up some Meltonian Nu Life Color Spray in Gold. They have a wide range of colors, so if I really wanted to, I could even change the color of these shoes completely. Keep in mind, if you are painting your entire shoe, you don't need to find an EXACT match, but if you are only touching up a spot or two, you need to choose your shade wisely. This gold is actually a little darker than the original shoe color, but I didn't mind.

In action:

Before and after:

Heel:

Side:


Toe:

Some other easy shoe repair:
Replace shoelaces (DIY)
Resole (go to a professional)
Retip (for pointy toe shoes-- again, go to a professional)
So what do you say? Are you feelin' a little cobbler in ya?

2.06.2010

fun V-Day date idea

I am not a huge Valentine's Day fan. I get annoyed by it, really. The only reason we ever do anything is because my husband kind of likes it :]

Anyway.

If I liked Valentine's Day, this would be a great date. There is an art studio nearby called artrebel and they specialize in art classes. They have a "Love Art" package, that is especially for dates. The Deluxe package includes: 2 hour session in the art studio (canvas, paints, and brushes included), two glasses of champagne, chocolates, and roses. There isn't any instruction, you are just left alone to create. 


How fun and romantic, right?! I thought so.

This package costs $250 but I found about this via Groupon (more on this later), because they had a coupon to get it for $95. That still seems pricey to me, but I love the idea. You could totally recreate this at home though! Snag a canvas and some paints from Michael's, buy your favorite champagne or wine, chocolates, and get from roses from Trader Joe's. (Throw an old sheet on the ground, too--don't ruin the carpet!) And presto--fun, creative, affordable date, and you get an awesome souvenir out of it!

So sidenote about Groupon. If you haven't heard of it, it is a website that when you sign up for their emails, you get a daily email of a rockin' deal around town. I figured I had nothing to lose (other than one junk mail message a day), and it could present a chance for us to see some of the city every once and awhile. The  coupons may be for restaurants, hotels, services, pretty much anything--but it is only one per day. They are typically something like this: "Get $30 toward your meal for only $15" ...so you essentially pay a discounted rate up front, like a gift card at half price. I haven't actually bought any yet, but I am waiting for the right time to pounce :]  Oh, and Groupon has deals at a long list of big cities in the US--not just LA.

What are you doing for V-Day?

1.31.2010

me, playing teacher

I mentioned in Orange Berlin review: part ii  that Brigitte did my hair in a super easy way that I never knew possible. This is what it looks like:

 { I felt like a 7th grade MySpacer taking this picture... }

And this is how I do it:

- Let hair air dry, do a little rub-rub with the towel, or just towel scrunching. Blow dry on low while scrunching, if you are in a hurry. but it looks best when it just air dries (easy peazy!) If your hair isn't naturally wavy, try sleeping with your hair in a braid, and doing the next steps in the morning.

- Mix (roughly) equal parts leave in conditioner (I use Pearatin Fortifying Repairative Serum by Loma, which is hands down the best hair product I have found, to date) and a sculpting wax (I use Graham Webb Brit Style Sculptor. Brigitte used some sort of curl cream wax and I loved it. I mix two products to imitate the one she used--that I of course forget the name of.)

- Rub it together really well in your palms, warm it up,and scrunch this concoction in. Do this evenly and gradually. I have super thick hair, so I am that sure I can handle more than my fine-haired-friends. Don't over do it, of it will look greasy. Start out slow, you can always add more.

*The wax was really the secret. I had never tried it before, and I love the way it looks. I am not CRAZY about how it feels, but it is often worth the trade off for me. It is that awesome.*

- Once it's totally dry, I fluff it around, and use a flat iron to tame the bangs, and give the front few pieces a little more bend. I know that curling your hair with a flat iron sounds crazy, but it is seriously perfect when you want loose, wavy curls. I hold the flat iron vertical while clamping a 1/2"-1" section of hair while pulling it taught and forward, away from my face, so the hair bends around the clamp of the iron.

Like this:

{ curling with a flat iron }

- Do this a couple of times on the same section, as it doesn't work in one fell swoop for long hair. I usually do a little bend at the end, then up once more toward the middle of the piece of hair. I go in the same direction, so it makes a loose curl, and not just a flipped out end. I don't do it too close to my scalp, as that looks too prom-y and perfect. More ringlet than messy. Leave it relatively straight on top, so it lays closer to your head, then wave up the ends.

Voile!

I hope these instructions made sense? Not quite a YouTube tutorial (which by the way, have you indulged in that yet? It's addicting.), but hey.

1.30.2010

tin ceiling headboard *edited 1.31.10*

I found this recently on Apartment Therapy

I LOVE it. Don't you?


I also love the shelving contraption they have going on. 

But the headboard--ooohhhh the headboard! I am coveting. I have been casually scoping out headboard ideas lately, as I want to try and make one in the (relatively near) future. There are some pretty amazing DIY headboard projects out there... but this one makes me debate throwing them all out the window and just ordering two 2'x2' panels and calling it a day.

These panels were purchased from American Tin Ceiling Co. for $8 per 2'x2', unfinished, .010 tin plated steel panel. 

Yeah. $8.

****

added 1.31.10

To clarify the cost of materials... What you see in the photo is listed under "Unfinished Tin" as Pattern 22. I don't know if the panels in the above photo were purchased finished, or if they were finished later. I don't own any of these yet, so I don't know how great or terrible they look unfinished in person. The website mainly says that they should be finished to prevent oxidation and such. My thought is that you most likely won't be struggling with rust if they are serving the purpose of a headboard... but what do I know? 

I think you could easily finish them yourself with a can or two of Rust-Oleum, if you decide you want to "finish" them, to be on the safe side. 

The photo also shows the panels framed in molding. I couldn't identify the exact pattern pictured on the site, but unfinished flat molding is sold in 4' sections at $8.50-$12 each. 

So my best estimate for your total cost is as follows:
2 unfinished panels - $8 each
3 4' sections of flat molding - $8.50 each
Shipping to Studio City, CA - $25
ORDER TOTAL: $66.50
+ a couple cans of Rust-Oleum that you might need... about $20
(POTENTIAL) GRAND TOTAL: $86.50

****

I would probably spend the same, if not more, on fabric and other crafty supplies if I went the plywood-batting-and-fabric route. 

But there really are some tempting options in that department...


I like the idea of sewing a matching skirt. Looks like another way for a poor girl to fake a rich looking bed ;]

I think I am starting to get a sewing itch again. Christmas is over, and life is finally settling down a bit since our big move, and now I want some fun little crafties to do!
Related Posts with Thumbnails