1.31.2010

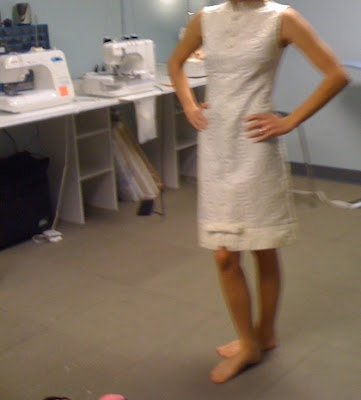
me, playing teacher

I mentioned in Orange Berlin review: part ii  that Brigitte did my hair in a super easy way that I never knew possible. This is what it looks like:

 { I felt like a 7th grade MySpacer taking this picture... }

And this is how I do it:

- Let hair air dry, do a little rub-rub with the towel, or just towel scrunching. Blow dry on low while scrunching, if you are in a hurry. but it looks best when it just air dries (easy peazy!) If your hair isn't naturally wavy, try sleeping with your hair in a braid, and doing the next steps in the morning.

- Mix (roughly) equal parts leave in conditioner (I use Pearatin Fortifying Repairative Serum by Loma, which is hands down the best hair product I have found, to date) and a sculpting wax (I use Graham Webb Brit Style Sculptor. Brigitte used some sort of curl cream wax and I loved it. I mix two products to imitate the one she used--that I of course forget the name of.)

- Rub it together really well in your palms, warm it up,and scrunch this concoction in. Do this evenly and gradually. I have super thick hair, so I am that sure I can handle more than my fine-haired-friends. Don't over do it, of it will look greasy. Start out slow, you can always add more.

*The wax was really the secret. I had never tried it before, and I love the way it looks. I am not CRAZY about how it feels, but it is often worth the trade off for me. It is that awesome.*

- Once it's totally dry, I fluff it around, and use a flat iron to tame the bangs, and give the front few pieces a little more bend. I know that curling your hair with a flat iron sounds crazy, but it is seriously perfect when you want loose, wavy curls. I hold the flat iron vertical while clamping a 1/2"-1" section of hair while pulling it taught and forward, away from my face, so the hair bends around the clamp of the iron.

Like this:

{ curling with a flat iron }

- Do this a couple of times on the same section, as it doesn't work in one fell swoop for long hair. I usually do a little bend at the end, then up once more toward the middle of the piece of hair. I go in the same direction, so it makes a loose curl, and not just a flipped out end. I don't do it too close to my scalp, as that looks too prom-y and perfect. More ringlet than messy. Leave it relatively straight on top, so it lays closer to your head, then wave up the ends.

Voile!

I hope these instructions made sense? Not quite a YouTube tutorial (which by the way, have you indulged in that yet? It's addicting.), but hey.

1.30.2010

a logo

I am so proud of myself! It turned out better than I even imagined. Woohoo!

I am working on fancifying my blog a bit. Nothing crazy. I prefer simple. But my banner (see top of screen) was step one, and this button (see side bar) was step two.

{ photo made with Picnik }

What do you think?

I made my "logo" using the wedding trendboard from my previous post, tart. I used Picnik to get it to look the way that it does. Once I had it looking the way I wanted it to (which took FOREVER, mind you) I used this tutorial from Simply Sam's blog.

Take my button (use the link on the sidebar) and stick it on your blog! Let me know if you have one, too. If you don't, now you know how to make one!

tin ceiling headboard *edited 1.31.10*

I found this recently on Apartment Therapy

I LOVE it. Don't you?


I also love the shelving contraption they have going on. 

But the headboard--ooohhhh the headboard! I am coveting. I have been casually scoping out headboard ideas lately, as I want to try and make one in the (relatively near) future. There are some pretty amazing DIY headboard projects out there... but this one makes me debate throwing them all out the window and just ordering two 2'x2' panels and calling it a day.

These panels were purchased from American Tin Ceiling Co. for $8 per 2'x2', unfinished, .010 tin plated steel panel. 

Yeah. $8.

****

added 1.31.10

To clarify the cost of materials... What you see in the photo is listed under "Unfinished Tin" as Pattern 22. I don't know if the panels in the above photo were purchased finished, or if they were finished later. I don't own any of these yet, so I don't know how great or terrible they look unfinished in person. The website mainly says that they should be finished to prevent oxidation and such. My thought is that you most likely won't be struggling with rust if they are serving the purpose of a headboard... but what do I know? 

I think you could easily finish them yourself with a can or two of Rust-Oleum, if you decide you want to "finish" them, to be on the safe side. 

The photo also shows the panels framed in molding. I couldn't identify the exact pattern pictured on the site, but unfinished flat molding is sold in 4' sections at $8.50-$12 each. 

So my best estimate for your total cost is as follows:
2 unfinished panels - $8 each
3 4' sections of flat molding - $8.50 each
Shipping to Studio City, CA - $25
ORDER TOTAL: $66.50
+ a couple cans of Rust-Oleum that you might need... about $20
(POTENTIAL) GRAND TOTAL: $86.50

****

I would probably spend the same, if not more, on fabric and other crafty supplies if I went the plywood-batting-and-fabric route. 

But there really are some tempting options in that department...


I like the idea of sewing a matching skirt. Looks like another way for a poor girl to fake a rich looking bed ;]

I think I am starting to get a sewing itch again. Christmas is over, and life is finally settling down a bit since our big move, and now I want some fun little crafties to do!

1.29.2010

jewelry holders

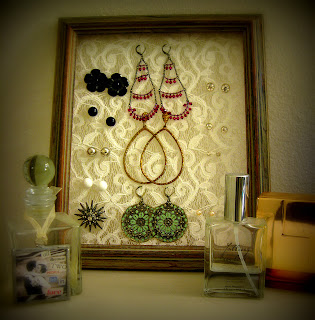
These are my methods for storing my jewelry.


#1 is made of a frame and screen -- constructed by my daddy.

#2 was $5 from IKEA

#3 is made of a frame and lace -- constructed by Lauren.

I love them.

They are oh-so-functional, and double as home decor!

...

That is all.
Happy weekend!

1.28.2010

Two Things I Love... around my home

So I am trying something new...

BacWoods Fern is starting this trend, and inspiring other bloggers to follow suit. So hey, sounds fun to me! And home decor makes me happy, so I love seeing everyone else's posts :]

Numero Uno:

{ Our bed }

I just washed our flannel sheets today, and clean sheets are the BEST feeling in the world.

Also, I have really, really wanted to be a super girl and cover our bed with pointless throw pillows ever since we got married, and my husband thinks that throw pillows on a bed are pretty much the dumbest things ever. His words: "Why?! So you can look at them for 5 seconds before you throw them on the ground and get in bed?"

I know. He has a point. ...But they are soooo pretty....

Anyways, this is my functional-pillow version. The four cream pillows are all standard sized pillows, in normal cream sheets (I am using every pillow case I have--ha!). The brown one is indeed decorative--I recently stole it from our couch. Because I was craving a prettier bed.

Thus, a this-will-do-for-a-poor-couple-who-wants-a-pretty-in-a-functional-way type of bed, was born.

The quilt at the end of the bed is one that I sewed myself (woohoo, me!)

#2 (yes, I know my numbering is inconsistent. I like it that way. And I never took Spanish, so I don't want to put myself at more risk for grammatical errors than necessary):


{ Husband's guitars hung on the wall in the dining area }

Matt doesn't play very often, but I love it when he does.

And I love how they look on the wall, even when he doesn't.

Thank you, dad, for helping us hang them :]

Oh, and ignore my dying bamboo in the picture...

...

Maybe you should try something new this week too? Perhaps you want to jump on the McLinky bandwagon of Two Favorite Things Around Your Home with your blog?  

Include a link to the BacWoods Fern post it in YOUR post about your two favorite things. Then hook up to the original post with McLinky.

1.27.2010

can i get a headband?

I have been hesitant about the whole hippie-headband trend thing. It took me awhile to warm up to the idea at all, and then was never sure how it was supposed to look on a girl with bangs...

Plus, all the headbands that I've liked are ones that I've seen on Etsy or other online stores (i.e. I can't try them on and convince myself).

So I was really excited when I found this little guy at Old Navy (I know, right?) for $6.50.

{ Old Navy headband -- not available online, only in select stores }

The rosette is made of raw edged twill--I bought mine in khaki, but stood there debating between this one, and the ballet pink, for several minutes.

Tough choice. Not gonna lie.

{ How I wear my hippie-headband with bangs }

...

Okay... so why the "can i get a headband" title?

Because I miss my Portland Trail Blazers, and the word "headband" always makes me sing this song:


Feel free to laugh at me now :]


1.26.2010

best save the date I've seen in awhile...

Watch it here.

Creative. Unique.

Love it :]

1.24.2010

pretties

This was a birthday gift from my dear friend, Lauren. Sorry, I know that I talk about her a lot. I just like her. :]

I wasn't expecting a thing, and I got this cute little card and AMAZING locket earrings. I think she even handmade them--which is 10x cooler.


{ Homemade card and earrings from Lauren }

I love mail!

And I love surprises!

And I love birthdays!

And I love cute little details!


Yay for me! :]

watch. this. now.

I command you.

You won't regret it.

In fact, you may cry tears of joy if you do it.

Go to The Flash Dance's blog and watch this:

{ Sorry, I really wish you could play the video from my blog, but I just wanted to include a screen shot to entice you... Follow the link to watch the video }

1.23.2010

thank you, anonymous

Yay for readers comments!

Today I got comment on my want list & need list post. I would love to give someone credit, but they left the comment anonymously ( Which is totally okay! I don't mean to single you out, anonymous :] ) suggesting that I try out We Love Colors for a cheaper version of those cute J. Crew anklet socks that I have been coveting for months now.

Umm... Jackpot!!

Not only are these socks bright and lightweight, which is what I was going for (and couldn't find elsewhere), they are mix and match! They are sold individually and the site seriously has every color imaginable. Amazing!


They aren't the anklet height like the J. Crew socks, but they could be scrunched down or even old-school folded down. Way cute.

Oh, and it gets better. They are only $3.50 each :] I won't have to feel guilty about dropping $24.50 on some trendy socks. And my husband won't be way annoyed.

As for shipping...it is a flat $5, no matter how much you order. Again--amazing!

I am a happy girl! Now I just have to decide on colors... Decisions, decisions.

Check out their Color Guide for the most accurate picture of what each color looks like. They display them as tights. These are in the running for my favs:


Aren't they great? And there are a ton more. The neon pink and charcoal are a definite yes. I can't decide how many I should get, and which other colors. I think I am pretty much in love with that bright blue, too... Oh man.

I am excited :]

1.22.2010

ELF Review #1

Here as I go! As promised, these are my product reviews from my purchases from Eyes Lips and Face.

This was my first order from ELF:

Blending wedges - $1
Nail Polish in Clear - $1
Nail Polish in Plum - $1
Nail Polish in Nude - $1
Nail Buffing Block - $1
Dual Pencil Sharpener - $1
Concealer Brush - $1
Foundation Brush - $1
Shine Eraser oil blotting sheets (50 sheets) - $1
Tinted Moisturizer SPF 15 in Light Beige - $1
Under Eye Concealer & Highlighter in Glow/Light- $3
Eye liner in Black - $3

*I also used a coupon code with saved me 50% off the first $16, which put my total for this order at $8! Shipping was $6.95.
**I also apologize for the way stupid spacing. Thanks, Blogger.

Blending wedges - What a rockin' deal! 8 wedges in hard plastic package that works as a storage container until you use the rest up. Blending wedges aren't anything to write home about, I know. So I won't say too much, other than they work, and I am glad I bought them :]


Nail Polish in Clear -Went on great, stayed on, and didn't yellow.


Nail Polish in Plum - Great color, and lasted great on my toes.


Nail Polish in Nude -Love this color too. Didn't last as long, because it was on my fingernails, and I beat my hands to death and chip the crap out of any polish that I wear!


Nail Buffing Block - Honestly, I haven't used this yet. I will save this review for later.


Dual Pencil Sharpener -Again, great deal for a makeup bag staple. I never had one before, because I always shared with my mom or friends before! Time for my own. Good choice.


Concealer and Foundation Brushes -I have never used these types of brushes before, and have always wanted to try them. Without having tried them before, I could never bring myself to dropping $20-30 on a brush from from Sephora or the department store makeup counter--even $10 from Target. But for a buck (50 cents with my coupon!) I figured I could even hate these things and not feel guilty. I actually really like them! I don't use them every day because it takes much longer to do my makeup when I involve brushes, and don't just use my fingers as blending tools. When I have the extra time though, I discovered it really is worth the effort--it gives that airbrushed effect. Perfect for hot dates and days that I don't work at 4am :]


Shine Eraser oil blotting sheets (50 sheets) - Another great deal on something that I never bother buying, because an $8 pack of 3" x 2" tissue seems just wrong. But $1 (and for me-- 50 cents!) it was a great addition to my purse. Even Matt can use one every once and awhile... However, as a side note, did you know that you can use toilet seat covers in a pinch? Brillz.

Tinted Moisturizer SPF 15 in Light Beige -I was really excited to try this one out. I am always intrigued by tinted moisturizers, but again, didn't want to invest in something I may hate. It was another 50 cent risk that I couldn't resist! I liked the way it went on, and the color and coverage were as I hoped they would be. I especially liked it when I used the foundation brush to apply it. The disappointing part was that after a few days of using it, I noticed that my cheeks were breaking out way more than normal. I realized that this product was the only change to my regular skin routine, so I quit, and sure enough, my skin cleared up. So far though, this was my only miss with anything ELF I have tried. 50 cent loss.

Under Eye Concealer & Highlighter in Glow/Light- This stuff is awesome. I like to blend the two tones together on the back of my hand before I apply it. If my circles are really bad, I put the highlighter on first, then cover it with the concealer. Make sure you put moisturizer on first, don't overdo it, and don't apply more if it has already dried--it can get cakey or rub itself off.


Eyeliner in Black -For $3, this was good. I was especially intrigued by this because it is 100% mineral based. It went on well and I like the color. However, it fades throughout the day, and if I don't have eyeshadow on, it transfers to my upper eyelids. It's good for a day that I just want natural looking makeup, or am not wearing much of it. I don't hate it enough to throw it away, but I probably won't buy it again.

1.21.2010

Hairpiece

I have been meaning to post this for awhile now... This AMAZING hairpiece was given to me by my lovely Cristine, whom you may remember from mr. & mrs. montgomery and sewing adventures continued... .

{ Hairpiece by Zida in Eugene, Oregon }

You may ALSO remember that I have been coveting a feather hairpiece for some time now [ see Peacocking ].

Don't you just love it when you friends really, really know you?

Thanks, Teen!

1.20.2010

second (and third and fourth) weddings... to the same dude

I just loved this post I read on Keely's blog, asleep to dream. It's called How to Plan a Wedding in One Week. It's a little lengthy, and somewhat of a thank you note in itself, so there is a lot of name dropping--but there are some cute, romantic moments that I am a sucker for. Keely had a wedding in Mexico in 2006, but her and her husband skipped all the paperwork, so it wasn't technically legal. This past Christmas, they had a little second wedding to celebrate the legal union part!

I originally found this via Elizabeth Dye's blog. She made Keely's original wedding dress for their Mexican ceremony in 2006.

{ gown by Elizabeth Dye in wedding #1 }

{ super amazing vintage shift dress for wedding #2 -- to the same guy }

*romantic sigh*

I love weddings. In case you didn't know that yet (umm... where have you been?!).

When my husband hits the big time and we're rich and famous, I want to be like Heidi and Seal, and have a new wedding for every anniversary. They were originally married in Mexico as well, and have been renewing thier vows on every anniversary since (3 times).

This was their latest (4th) wedding, in LA, due to Swine Flu scares, with a White Trash theme.


{ photos via Pop Sugar }

How amazing is that?! Oh yeah, Heidi is definitely pregnant there, too. Classic.

I think my husband would totally be down with a White Trash Wedding, but I think I would want a couple more pretty ones first. :]

First I think I'd go for a 50s vibe... Something like this.


Then something totally whimsical [in a Victoria magazine kind of way, NOT in a Renaissance fairy kind of way] Something like this...

{ custom wedding gown by Leanne M. }

With this pee-my-pants amazing dress, I would top it off with some crazy whimsical headpiece like this:

{ headpiece by twigs & honey; gown by Elizabeth Dye }

My mom remembers me telling her when I was a little girl that I wanted to have lots of weddings--all to the same person. 

So yeah, I am that girl. 

And it's been since birth.

1.19.2010

wedding budget/fundraising tip?

Check this out, via Offbeat Bride.


That is $20,000 for those of you who can't do quick math (Who am I kidding? I used a calculator.)

Hop on over to Offbeat Bride for the whole shebang, but basically they are doing this over 7 months time, aim to get married this summer, and are in it for the positive environmental impact--besides the cash.

Sounds like a pretty lofty goal to me, but it sounds pretty dang awesome. I am anxious to see how quickly they will succeed. I am sure they will, the only thing I am skeptical of is their timeline--they will need to move their wedding date, change their budget, or keep saving cans after their wedding to pay off their credit cards. That is just my realist (perhaps skeptic?) prediction.

Don't get me wrong though, this is such an incredible goal. I am totally on Team Spokane!!


{ photo via Offbeat Bride }

Any readers in the Spokane area, send your cans to these lovesick puppies!

I will keep you updated on the end result. We will see if they prove me wrong! :]

What do you guys think of this?

1.18.2010

Orange Berlin review: part ii

Since I did excessive describing in my Orange Berlin review: part i, I will keep these shorter. You now know the ambiance, the stylist, and the general vibe of the salon. After my initial appointment for a haircut, I have been back to Orange Berlin twice:

Highlight appointment :: December 24, 3pm
Brigitte was not very impressed with my at-home attempts at lightening my hair (neither was I) and was insistent in scheduling me for highlights on Christmas Eve so I could have "pretty Christmas and Birthday hair!" I was very appreciative.

She did a TON of foils on my head, as I have a lot of hair, and my hair was pretty dark. She was very meticulous and careful to make the streaks very tiny, but large in number, so they would look natural but cover a lot of hair. (Umm... and can I please mention that this took FOREVER? I was seriously there for FIVE HOURS.) I was so excited to go back to blonde. We flipped through the sample book to choose a toner color, and chose one on the agreement that what I was going for was "more Giselle blonde than Claudia Schiffer blonde."
Unfortunately, what I ended up with was hardly different than what I walked in with. The toner was way too dark, and even reddish. Brigitte is still stumped as to how this happened, because according to her, my hair was "very blonde" pre-toner (I never saw it, this stage was just in the sink). I told her I really wasn't happy with the color, so she used a product called Re-Light (sp?) to tone down the redness, and give it a cooler tone. I was happier with this, as it canceled out the red, and even showed a little more blonde through, as a result of re-washing my hair immediately after coloring--but it was still brown. I left very disappointed that my hair wasn't blonde. The highlights were done very well--natural, shimmery--but subtle.

Apparently, I shouldn't have ever used permanent hair-color on my naturally blonde hair when I decided to go dark. I should have used a toner, which slowly fades out, and makes for a much easier transition when wanting to go back to my natural color. I didn't even know you could buy this without being a stylist! Ugh. Going back to blonde that I want will be much harder than I thought. I tried it last May and totally hated the tone, so I re-dyed it to brown. I should have used a toner on that, and I probably could have stayed blonde. Oh well, lesson learned, I suppose?

I am noticing that the toner is indeed fading, and my highlights are surfacing.

Maybe this is the best way to transition to blonde? Switch so gradually that no one will notice? I am trying to stay positive.

I am washing my hair more often, thoroughly scrubbing with my shampoo, and rinsing with hot water to encourage the fading...but don't worry and use lots of conditioner :]


{ here is a before and after so you can at least sort of tell that, yes, my hair is a little lighter... }

Complimentary bang trim :: December 30, 3pm
This was a very pleasant and quick stop in. I had an appointment, didn't have to wait, sipped a Mimosa, got my bangs trimmed, talked with Brigitte about how my toner will soon fade and my hair will get blonder by the day, and went on my way. :]
{ photo 1 via a hilarious post on Mod Mom Furniture blog (Seriously! Go read it!); photo 2 via Think Big blog }
Related Posts with Thumbnails